Radio Button and Check Box

mvc-template1
In Biz Apps, you almost always need to use Check Box and Radio button.

Check box is to select multiple objects, and radio button is only select one of multiple objects. The reason we call “Radio button” is originally came from Car Radio; It is only let you select one station at a time.
radio-checkbox-img2
In Spring MVC, check box object is usually a list of String, and radio button is Integer. You will defined them in a Model layer (Bean).

There are some examples for Radio Button and Check Box in Biz Apps. Typically, you will used them in a list.

  1. The specified row (by Radio Button) will be updated.
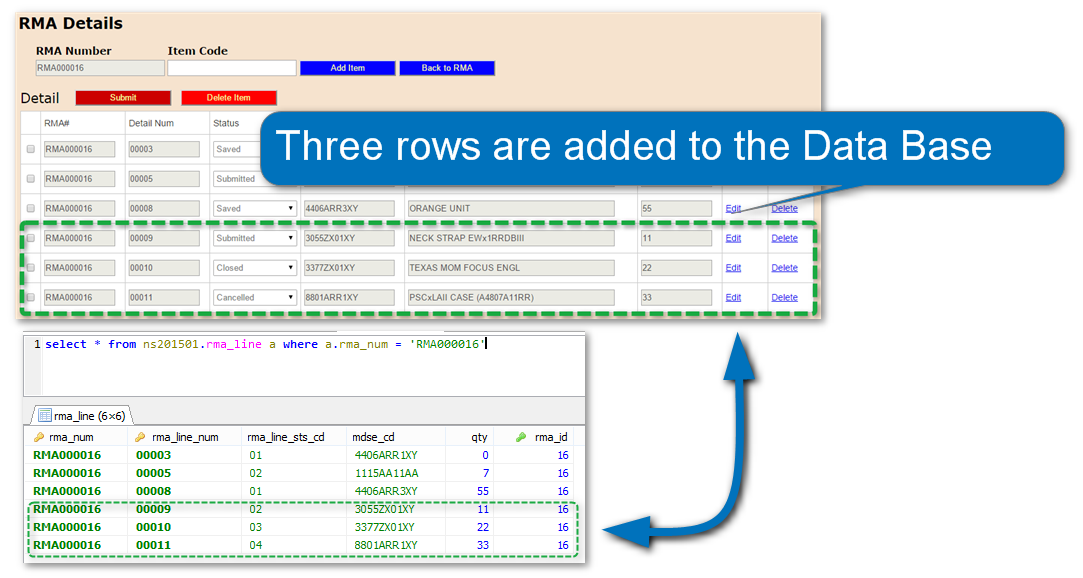
  2. Selected records will be updated/deleted. (Many to Many)
<c:forEach items="${HDR_LIST}" var="rmaObj" varStatus="loop">
	<tr height="15">
		<td><form:radiobutton path="radioBtn" class='close clickIdx' data-id='${rmaObj.id}' /></td>
		<td><form:checkbox path="selectedCheckBox" value="${rmaObj.rmaNum}"/></td>
		<td id="id${loop.index}">${rmaObj.id}</td>
		<td id="idRmaNum${loop.index}">${rmaObj.rmaNum}</td>
		<td id="idStsCd${loop.index}">${rmaObj.rmaHdrStsCd}</td>
		<td id="idStsNm${loop.index}">${rmaObj.rmaHdrStsNm}</td>
		<td id="idTpCd${loop.index}">${rmaObj.rtrnTpCd}</td>
		<td id="idTpNm${loop.index}">${rmaObj.rtrnTpNm}</td>
		<td id="idRsnCd${loop.index}">${rmaObj.rtrnRsnCd}</td>
		<td id="idRsnNm${loop.index}">${rmaObj.rtrnRsnNm}</td>
		<td id="idCustCd${loop.index}">${rmaObj.sellToCustCd}</td>
		<td><a href="<c:url value='/edit/${rmaObj.id}' />" >Edit</a></td>
		<td><a href="<c:url value='/remove/${rmaObj.id}' />" >Delete</a></td>
		<td><a href="<c:url value='/cUrlValSubLine01Jsp/${rmaObj.rmaNum}' />" >Detail</a></td>
	</tr>
</c:forEach>

1. Radio button is defined as integer that will contains a row number
2. Check box is defined as List of String that contains a value of selected record(s)

package com.ns.spring.model.ui;

import java.util.ArrayList;
import java.util.List;

import com.fasterxml.jackson.annotation.JsonIgnoreProperties;
import com.ns.spring.model.RMA_HDR;

@JsonIgnoreProperties(ignoreUnknown = true)
public class RmaHdrModel {

	private int id;
	private String rmaNum = "";
	private String rmaHdrStsCd = "";
	private String rmaHdrStsNm = "";
	private String rtrnTpCd = "";
	private String rtrnTpNm = "";
	private String rtrnRsnCd = "";
	private String rtrnRsnNm = "";
	private String sellToCustCd = "";
	private String mdseCd = "";
	private List<RmaLineModel> rmaLines = new ArrayList<RmaLineModel>();
	private int radioBtn;
	private List<String> selectedCheckBox = new ArrayList<String>();
	
	public RmaHdrModel(){}

.
.
.
.

	public int getRadioBtn() {
		return radioBtn;
	}

	public void setRadioBtn(int radioBtn) {
		this.radioBtn = radioBtn;
	}

	public List<String> getSelectedCheckBox() {
		return selectedCheckBox;
	}

	public void setSelectedCheckBox(List<String> selectedCheckBox) {
		this.selectedCheckBox = selectedCheckBox;
	}
}

Multiple Row Form Submit

submit-multi-form2
In biz apps, it is a common requirement that the data stays in the screen but not in the data base. And it’s pretty painful, compared to insert the record every time the user add it.

Suppose your screen displaying a list, and you have added more than one rows at once (But not in the Database yet)
submit-multiple-rows1
Once submitted, the added rows are in the Database:
submit-multiple-rows2

Summarized as two steps:

  1. The each row added one by one in the screen
  2. All rows are inserted/updated to the Database

@RequestMapping(value = "/cUrlValAttrbSubLine01Jsp", params = "addItemSubLine01", method = RequestMethod.POST)
public ModelAndView addItemSubLine01(@ModelAttribute("rmaLineListModel") RmaLineListModel rmaLineListModel, Model model, HttpServletRequest req) {
	
	ModelAndView modelAndView = new ModelAndView(VIEW.SUB_LINE_01.getVal());
	modelAndView.addObject(CONST.FORM_KEY.getVal(), rmaLineListModel);

	String rmaNum = rmaLineListModel.getRmaNum();
	String mdseCd = rmaLineListModel.getMdseCd();
	String mdseNm = CommonBL.getMdseNm(CommonBL.getMdse(mdseCd));
	List<RmaLineModel> currList = rmaLineListModel.getRmaLineModelList();
	
	RmaLineModel newRow = new RmaLineModel();
	newRow.setRmaNum(rmaNum);
	newRow.setRmaLineNum(RmaDtlBL.getNewLineNum(currList));
	newRow.setMdseCd(mdseCd);
	newRow.setMdseNm(mdseNm);
	currList.add(newRow);
	
	rmaLineListModel.setRmaLineModelList(currList);		
	modelAndView.addObject(CONST.LINE_LIST_MODEL.getVal(), rmaLineListModel);
	modelAndView.addObject(CONST.HDR_STS_LIST.getVal(), CommonBL.getStsList(req));	
	return modelAndView;
}

At Step 1, in the Controller method, line between 12 to 17, adding a new Object added to the list

@RequestMapping(value = "/cUrlValAttrbSubLine01Jsp", params = "submitLine", method = RequestMethod.POST)
public ModelAndView submitLine(@ModelAttribute("rmaLineListModel") RmaLineListModel rmaLineListModel, Model model, HttpServletRequest req) {

	String rmaNum = rmaLineListModel.getRmaNum();
	List<RmaLineModel> currList = rmaLineListModel.getRmaLineModelList();
	if (!CommonBL.isEmpty(currList)) {
		for (RmaLineModel obj : currList) {
			String rmaLineNum = obj.getRmaLineNum();
			List<RmaLineModel> rmaLinsList = RmaDtlBL.getRmaLineListWithCdTblNm(rmaNum, rmaLineNum);
			if (CommonBL.isEmpty(rmaLinsList)) {
				// New Record
				this.rmaLineSvc.save(RmaDtlBL.getRmaLineObj(obj, rmaNum, rmaLineNum));
			}
		}
	}
	List<RmaLineModel> rmaLineModelList = RmaDtlBL.getRmaLineListWithCdTblNm(rmaNum, null);
	return getMVSubLine01(rmaNum, rmaLineModelList, req);
}

At Step 2, in the Controller, it takes a parameter (Model class) contains a list, and the three added rows are now added.